Monoprice Miniprinters: Difference between revisions
No edit summary |
|||
| (One intermediate revision by the same user not shown) | |||
| Line 71: | Line 71: | ||
14. If the blue masking tape is damaged in the process, remove it and apply some fresh masking tape to the printer surface. Please remember to turn off the printer when you are done printing. | 14. If the blue masking tape is damaged in the process, remove it and apply some fresh masking tape to the printer surface. Please remember to turn off the printer when you are done printing. | ||
=== Printing Using Cura Slicer === | |||
* https://ultimaker.com/software/ultimaker-cura | |||
* Select Monoprice Select Mini V1 Preset Printer | |||
* Open Model | |||
* Save gcode to SD Card | |||
* Level the print bed? https://www.youtube.com/watch?v=WD_0FlTf3_I | |||
* Insert SD card into printer | |||
=== Troubleshooting Monoprice Mini Prints === | === Troubleshooting Monoprice Mini Prints === | ||
Latest revision as of 18:33, 15 January 2022
| Noisebridge | About | Visit | 272 | Manual | Contact | Guilds | Resources | Events | Projects | 5MoF | Meetings | Donate | (Edit) |
| Guilds | Meta | Code | Electronics | Fabrication | Games | Sewing | Music | AI | Neuro | Philosophy | Funding | Art | Security | Ham | Brew | (Edit) |
| Fabrication | Sewing | 3D Printing | Wood Shop | Metal Shop | SparkleForge | Laser Cutter | Vinyl Cutter | (Edit) |
| 3D Printing | Notes | Monoprice Miniprinters | Creality CR-10 | EmberPrinter | Connex 350 | Edit |
Monoprice Miniprinters[edit]
We have a number of Monoprice Select Mini 3D Printers (Mono-4,Mono-3, Ripley). Information on their specifications is found here: https://www.monoprice.com/product?p_id=15365. They key thing to note is they have a 12cm cube of buildable area. [1](MPSelectMini.com) has a wealth of information about them. If you have any problems or successes with the printers please try to log them on their pages if you can.
To print your file on the Monoprice Miniprinters, you can do it one of two ways. Full instruction manual is available.
- Use the THREED 3D Printer Terminal.
- Install the Slic3r software on your own computer.
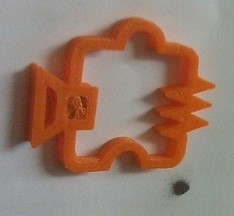
If you are new to 3D printing, you can start by printing our Noisebridge symbol fridge magnet which you can download from Thingiverse.
Printing on your own computer[edit]
- Install Slicer 1.2.9. Make sure you download 1.2.9 or you won't be able to load the configuration file.
- Download the Monoprice printer configuration file.
- Open Slic3r and click File Menu --> Load Config Bundle..
- Select the previously downloaded config file.
- Verify important settings like (see [2] of manual for more recommendation):
   * Printer Settings tab > bed size: 120mm x 120mm
   * Printer Settings tab > print size: 60mm x 60mm
- Turn your STL file into a GCODE file with the MONOPRICE settings before putting the GCODE onto an SD card and putting it into the monoprice printer.
Printing on the Threed[edit]
1. Open the Slic3r app
2. In the Slic3r window, click Add...
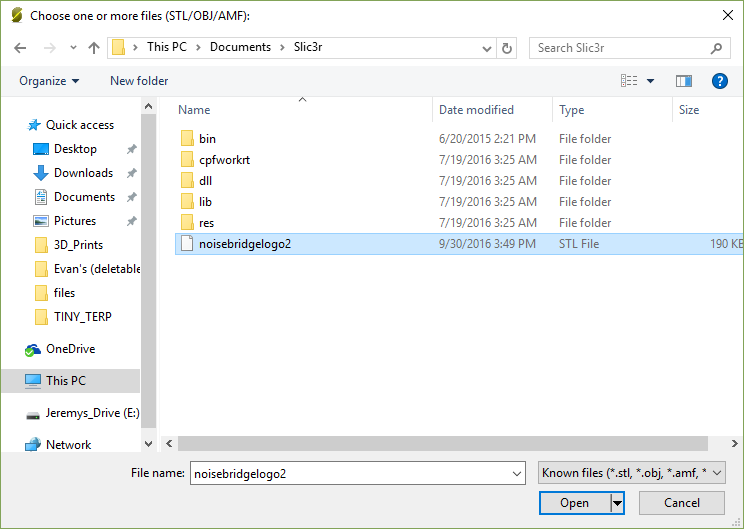
3. Choose the file you want to print (there is a test file in /Documents/Slic3r/noisebridgelogo2.stl which you can download from Thingiverse)
4. Select the Noisebridge logo file or your own.
5. The file shows up in the preview window. Most of the correct settings are pre-loaded with the configuration file, but if you are using a filament other than PLA, you must change the temperature settings under the "Filament Settings" tab. Check the side of the filament spool for the recommended temperature settings and stick to the low end of the range.
6. Click "Export G-code" to export the g-code file to the SD card (inserted in the computer).
Note: Don't use the path as shown on screen, pick the "F:" drive. Sometimes, the SD-card isn't recognized unless you take out the adapter, insert the SD-card into that and put the whole module in!
7. Remove the SD card from the micro SD card adapter in the Threed computer.
8. Insert SD card gently into a slot on the right side of the 3D printer. You may have to turn the machine off and on again if the SD card is not recognized.
9. Move the knob till it points at "Print" and push it like a button.
9. Turn the knob to choose the file you want to print and push it like a button.
10. If the temperature screen does not say "Preheating" under the extruder side, manually set the preheat temperature by selecting the extruder temp and twisting the knob until the correct temperature is displayed, then push the knob like a button.
11. Watch the progress screen till the temperatures heat up the extruder and platform to the target temperatures (this will take a while so be patient).
12. The printer will start printing.
13. Wait for it to finish and enjoy your finished item by scraping it off the build platform with a thin piece of metal.
14. If the blue masking tape is damaged in the process, remove it and apply some fresh masking tape to the printer surface. Please remember to turn off the printer when you are done printing.
Printing Using Cura Slicer[edit]
- Select Monoprice Select Mini V1 Preset Printer
- Open Model
- Save gcode to SD Card
- Level the print bed? https://www.youtube.com/watch?v=WD_0FlTf3_I
- Insert SD card into printer
Troubleshooting Monoprice Mini Prints[edit]
- My print isn't sticking to the bed
- Start by replacing the blue painters tape on the print bed. Please don't use Kapton tape for the Monoprice Minis. Kapton tape is expensive and best suited for ABS filaments, which don't print well on the minis.
- Next level the bed. If the extruder nozzle is not extruding or tearing up the tape, it is probably too close. If the filament isn't sticking to the bed, it is probably too far. You can use the four screws on the surface of the bed to raise or lower each corner. The bed is level when a sheet of paper can pass between the nozzle and bed at each corner with only slight resistance. You can find the hex keys for leveling the bed in the 3D printing supplies box (a black plastic bin in the fabrication area).
- Check your temperatures against the manufacturer's recommendations or the 3D printing lab notebook(a composition notebook with helpful printing hints).
- Apply a thin (very light) layer of hairspray to an unheated print bed with a fresh layer of blue painters tape
- Plastic isn't coming out of the extruder
- If the extruder is blocked you can use the "atomic method" to unblock it, detailed here: [3]
- If that doesn't work, please tell other people in the space so they can get someone to work on it.


