Maker Faire Build Night 2015-03-12
This is part of the Noisebridge Booth for Maker Fair 2015 project
Recap[edit]
The project continues.
We worked on cutting the tabletop and substructure and started joining parts together. We had a good group and hopefully everyone that attended learned something new about woodworking, measuring, and the problems involved with both.
To cut down long thin sheet goods we used the skill saw and a cutting guide. This would be too cumbersome for the table saw. We offset the guide from the line that we want to cut then run the skill saw down the work piece. We end up with a fairly accurate and straight cut.
To work out the distance for the cutting guide, we attached it to a piece of scrap material and marked it's location. We then used this to measure. It didn't end up being quite as easy as that but it helped
We started getting it down and even had a little assembly line action going for a second. I think everyone got a shot at doing all the tasks.
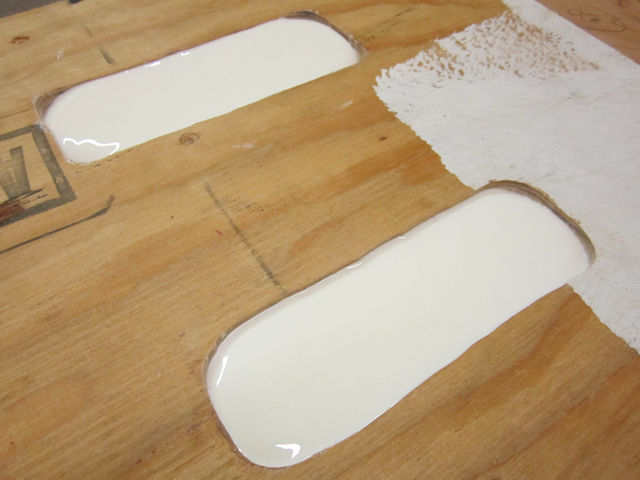
The biscuit joiner cuts little half ellipse holes into the side of the wood. The biscuit joiner does not require precision, but usually one places the pieces together and marks them at the same time. Which is then covered in glue and a small compressed wood biscuit is placed in the void. This expands and fills the void as the glue is absorbed. This dries and creates a reasonably strong joint.
We put glue on both sides of the join and made sure that it was also inside the cuts for the biscuits. We also used the glue brush to spread the bead of glue to make sure the joint was fully covered.
With the glue and biscuits in place, we slide both parts together. The biscuits allow some movement along the joint for aligning the parts, before clamping
Now the part just has to dry. Since this is a fairly critical joint in the table, we are going to leave this clamped until the glue is at full strength. Often, I will remove the clamps after about 20 - 40 minutes so I can reuse them to assemble the next piece.
We used the same process for the finish top. This is Oak Veneer plywood and this is the part that will be routed with the logo and filled with resin.
You may recall that last week we poured some more resin. Here is the result. This time we didn't use the spray mount to adhere the mylar to the test peice before casting and a good amount of resin seeped between it and the wood. So now we know, use the spray mount going forward.
The leakage resulted in an uneven cast on the surface. We also did in fact use too much white pigment. Both parts came out way too opaque to work well with LEDs underneath them. I would like to try the white again, but I am out of resin for now.
Until next time..
Goals and Tasks[edit]
Tabletop and Sublayer Cut Continues[edit]
We are going continue on making the top logo surface that will later be routed to for the resin Noisebridge logo, and the structural sublayer that will host the LEDs and the electronics. This time we should definitly have time to get out the plate (Biscuit) joiner and have a chance for everyone in attendance to learn how to use this great tool.
expected process
 cut two 2' 6" x 5' 0" panels out of finish plywood (in progress)
 cut two 2' 4.5" x 4' 10.5" panels out of finish plywood (3/4" smaller on all sides than the finish layer. (in progress)
 The order of the cutting is important as we need to be left with long pieces of finish plywood.
 use a PLATE (BISCUIT) JOINER to create the 5' x 5' panels.
 clamp so that the panels are flush and store on a flat surface for the next build night.
materials/notable tools needed
 3/4 finish and C grade plywood
 wood glue
 skill saw and cutting guide
 plate joiner
 Number 20 plate joiner biscuits
Resin test part 2[edit]
We will light up the new resin test pieces that we made last week and see how to proceed with the resin pigments going forward.
Reference[edit]
Here is a brief video showing the plate (Biscuit) joiner and same process we will use to make our table top https://www.youtube.com/watch?v=-5jFkNIOhuQ
Longer video that explains some situations where you would use a biscuit joint and why. https://www.youtube.com/watch?v=utEGeY-cWrg
http://en.wikipedia.org/wiki/Biscuit_joiner
Table plans are here: https://noisebridge.net/images/a/a7/Noisebridge_MakerFaire_Table.pdf


